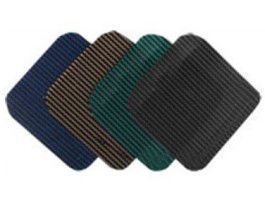
A small tear or rip can be repaired by the installer or consumer with one of our safety cover patch kits. The kit includes three sheets of cover material (each sheet measures 4" x 8") with a crack and peel adhesive already applied to the material.
Installation instructions are as follows:
- Area to be patched must be clean and dry on both the top and bottom. Use Isopropyl alcohol to clean the area to be patched
- Trim any loose threads or irregular material
- Lay cover on a clean flat hard surface
- Trim the patch with rounded corners so that it is at least 1” larger than the hole on all sides
- You will need a patch for both the top and bottom. Use the patch as a template and cut out another patch
- Remove the backing strip from the adhesive side of the first patch
- Place the patch over the hole and with firm pressure smooth wrinkles from one side to the other making sure that the patch makes full contact with the cover
- Repeat steps 6 and 7 for the bottom of the cover
- Ideal temperature for the patch adhesive is +70 F (21 C). If the temperature is below 70 F, you may need to use a hair dryer to heat the cover and adhesive side of the patch to obtain maximum adhesion. Application below 50 F (10 C) is not recommended.
- There is no warranty, expressed or implied, that a safety cover repaired with an adhesive patch will meet ASTM standards.


